
Training Channeled VL > Technique
Summary
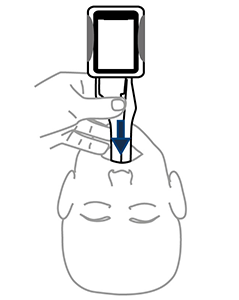
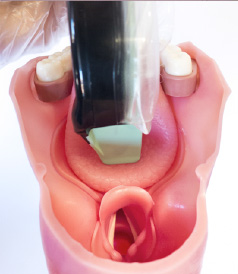
1. Slide midline around the tongue
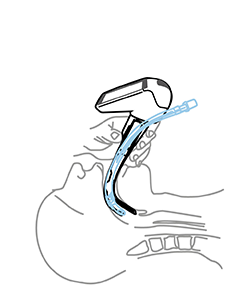
2. Center vocal cords
3. Push ETT
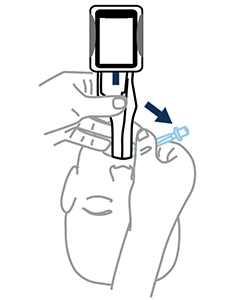
4. Remove midline
- Keep Midline
- Do not insert too deep
- Lift gently
- Twist Airtraq to center vocal cords
- Corkscrew ETT if needed
Macintosh vs Miller
Macintosh Blade in the Vallecula (preferred)
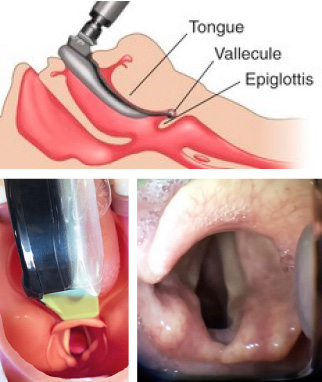
- Airtraq allows both techniques
- Macintosh style is the preferred option since it requires less upward traction and therefore it is softer on patient tissues.
- If the Airtraq is already underneath the epiglottis and the user prefers to intubate Macintosh style withdraw the Airtraq until the epiglottis falls and advance the tip of the blade into the vallecula.
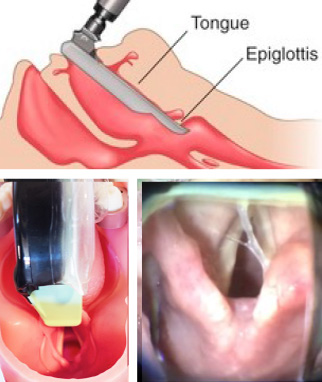
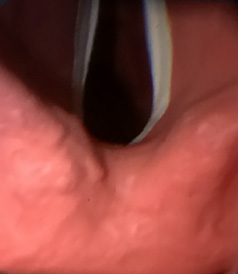
Miller Blade underneath Epiglottis
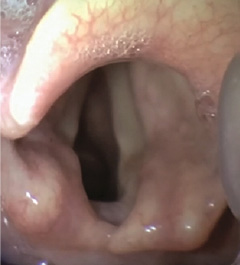
Location of glottic structures
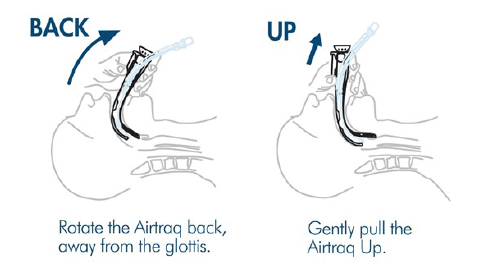
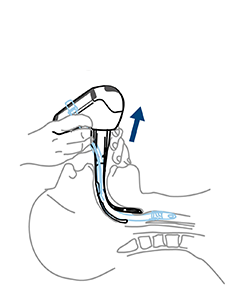
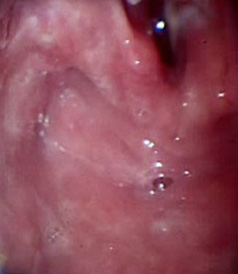
If vocal cords are not seen it is very likely that Airtraq has been inserted TOO DEEP, if so perform the following maneuver:
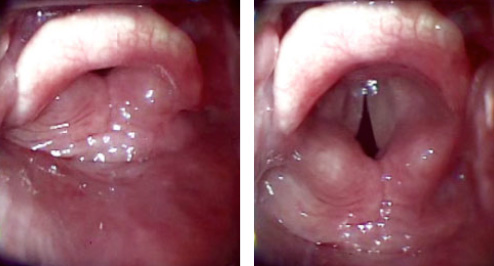
A gent lift of the Airtraq causes the glottis to open and drops the interarytenoid notch below the middle of the image (optimal position for successful ETT insertion)
Most common pitfalls
Pushing tongue inwards
Airtraq elevation too early, before tip of the blade gets to back of tongue
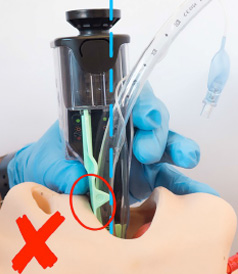
Airtraq not midline
Airtraq inserted like a direct laryngoscope blade (to the left of the oropharyngeal cavity)
Airtraq inserted Too Deep
Airtraq inserted too close to the glottis or too posterior in front of the oesophagus
Airtraq tilted against upper teeth
Airtraq tilted against upper teeth